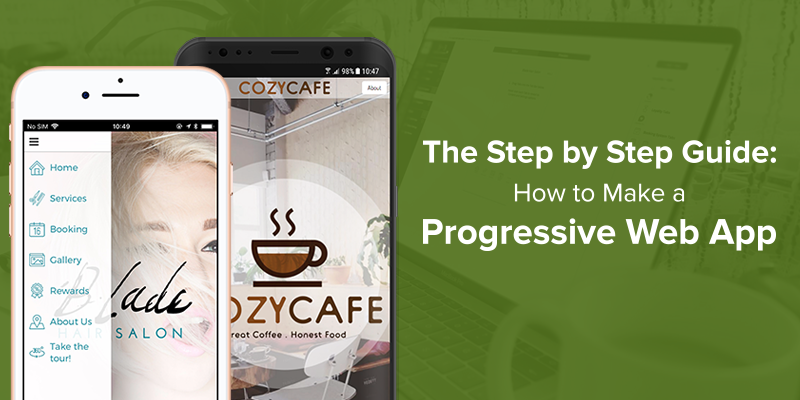
Even if you’re only vaguely interested in following the latest mobile web trends, you will have been hearing plenty about Progressive Web Apps lately. For the uninitiated, Progressive Web Apps – or PWAs for short- offer the same functionality and responsivity as an app, the only difference being that it’s accessed through a browser, like a regular mobile-first website. It looks like an app, it loads as fast as an app, and it converts users to customers like an app- what’s not to love?
But it’s not just about design, it’s about the bottom line. The responsiveness of a PWA cuts down on the 53% of users who abandon sites if they take three seconds or more to load. A link to your PWA can be downloaded to a smartphone’s home screen, complete with an icon, increasing the number of customers who return to make a second purchase. And all told, PWAs increase customer engagement by up to four times, and double the amount of time they spend on your site!
What you might not know is that you don’t actually have to be a web developer to be at the bleeding edge of web development! Progressive Web Apps aren’t just the domain of big business. They’re for everyone, SMEs included, and they’re easy to design for yourself. In fact, you can do it right here through our very own app builder! That’s why we’ve created this step by step guide to help you through the process.
1. Create a Free AppInstitute Account
The very first thing you’ll have to do is sign up for a free account. It only takes a second, and you won’t even have to confirm your email address- at least not yet. Sign up through the big “Try it out” button in the nav bar above.
2. Set up your app for the first time
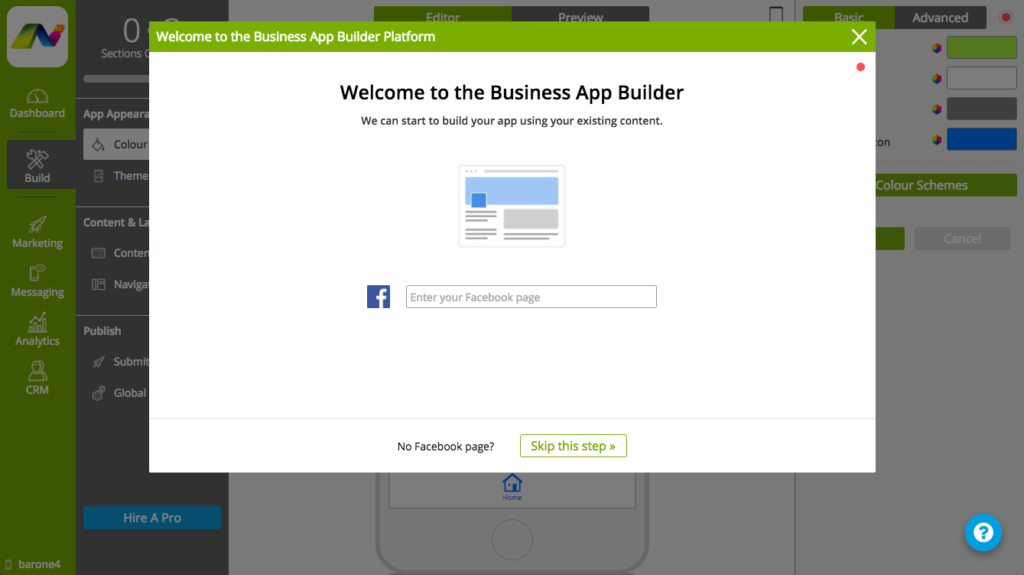
Once you’ve logged in, the App Maker Wizard should appear. The very first thing you’ll be asked is to enter the link for the Facebook page of your business. Why? Because the App Maker Wizard can analyse your existing content in order to come up with some ideas for you! If you don’t have a Facebook page for your business, or you don’t want to use it as a template for any reason, you can skip this step.
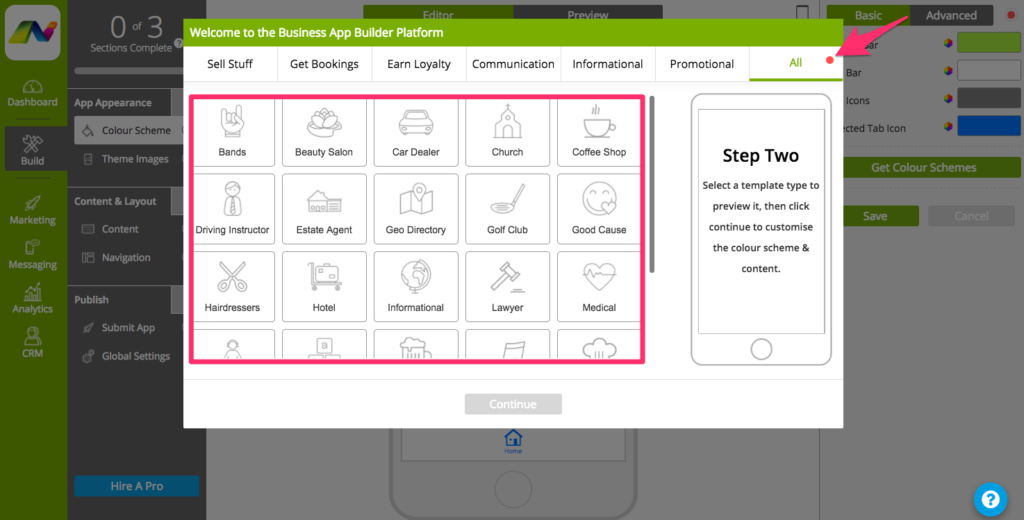
If you don’t have a Facebook page, or skipped the step of providing the link for it, you’ll be able to choose from a range of business types in order to find a template that works for you. You can choose from a few general purposes that your PWA might have, like selling stuff, promoting something, or earning loyalty points. Then you can pick what kind of business you run: a beauty salon, a coffee shop, a hotel, and so on. If there’s nothing that fits the bill exactly, select ‘Other’.
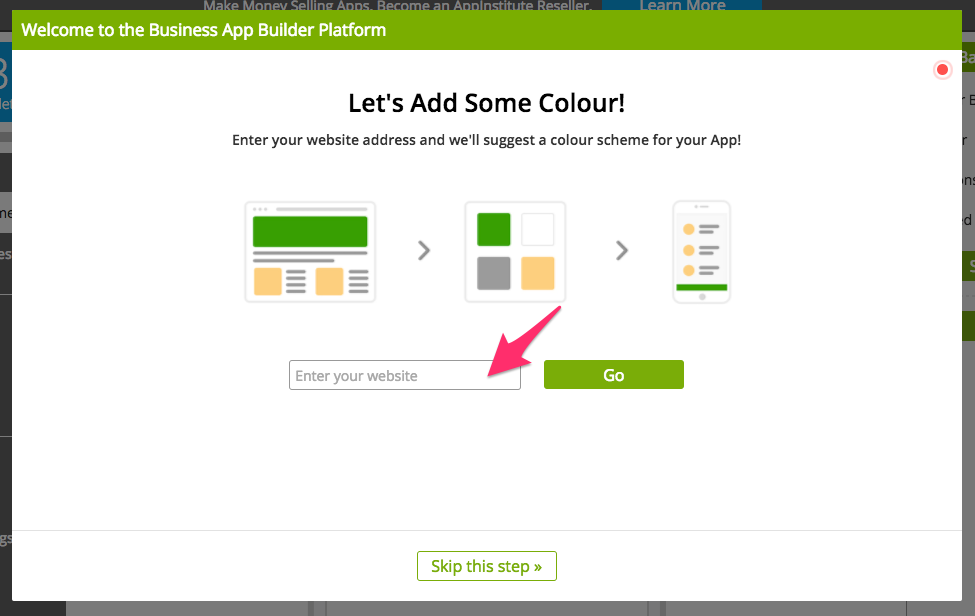
At this point, we use a little bit of wizardry and magic to automatically create a colour scheme for you. Simply enter your website address and click ‘Go’. The App Maker Wizard takes a look at your website and picks out a colour scheme based on your existing content! Again, if you’d rather not, or you simply don’t have a website, you can skip this step and manually choose a colour scheme later.
If you’d like, you can preview the app on your own smartphone or tablet. The next step is to enter your mobile number, and if you do, we’ll send you a link to download the AppInstitute Preview App. If you don’t like what you see, you can always make manual adjustments later on to fine tune and tweak your content. If you do like it, the next step is to start customising and creating content for your PWA!
3. Get to grips with the Build Menu
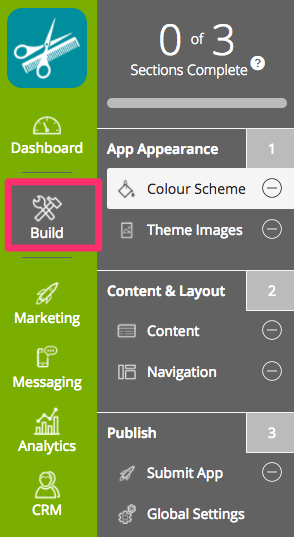
The ‘Build’ menu takes just three steps to get from start to finish. The first step edits the appearance of your app, the next the content and layout, and the last step is publishing the finished article.
4. Tweaking the colour scheme
This is where you start really designing. Our colour scheme editor lets you change the colour of every element of your PWA, from the menu to the background and text. This lets you keep complete control over your branding from start to finish.
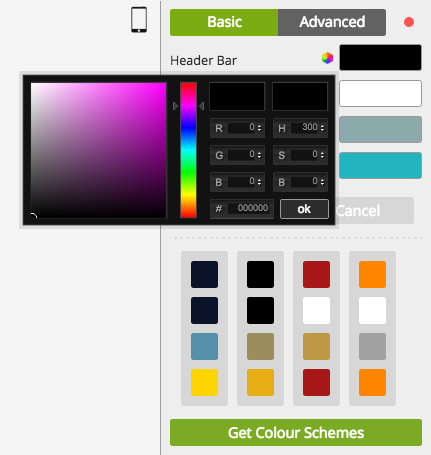
The colour scheme editor has two parts: basic and advanced. The basic editor lets you choose from four simple colour palettes; advanced lets you customise every aspect of design. Of course, you can customise the colours in each palette to suit your taste using either a colour wheel or hex colour codes.
5. Adding your icon
Even though your PWA will be published online, not on the app store, you still need an icon. This icon will be a part of the page header in your PWA, and should be instantly recognisable. If your business already has a logo, use it!
Add an icon through the ‘Images’ bar under ‘App Appearance’.
![]()
6. Choose an image for your splash screen
When somebody accesses your PWA, the splash screen is the first thing they’ll see, so it has to promote your brand and make a good impression. Don’t pick something too generic like an obvious stock photo; the more personalised, the better, especially if it shows your products or services.
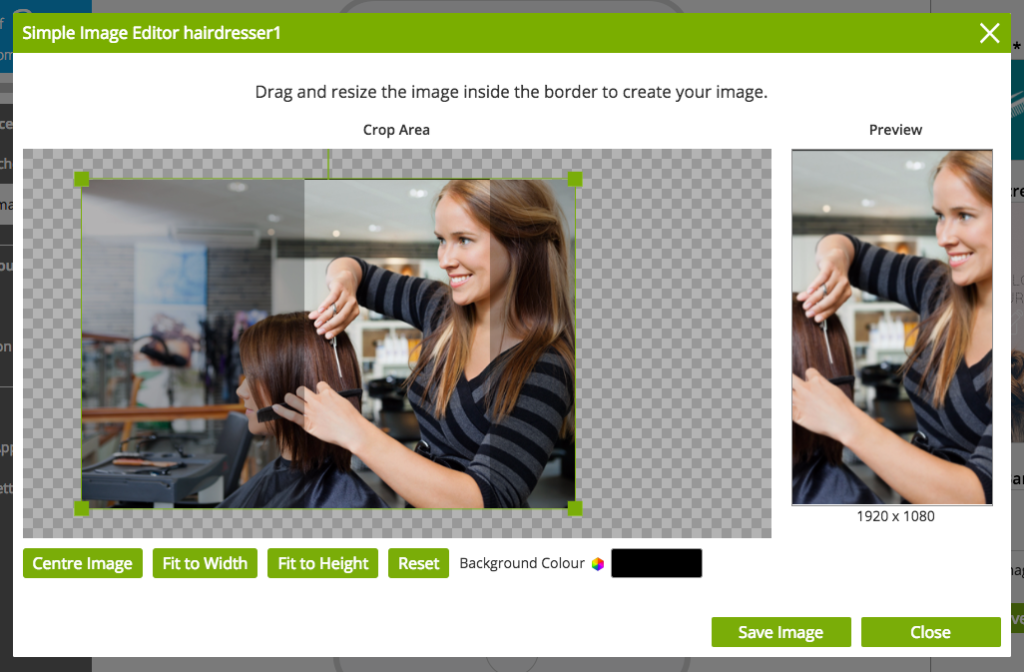
To upload a splash screen image, go to the same tab as where you uploaded your icon. Click on the box in the right-hand toolbar to either upload an image from your own computer, or one of our default choices. Our advice is to pick a high-quality image to make a great impression!
7. Add tabs and functionality to your PWA
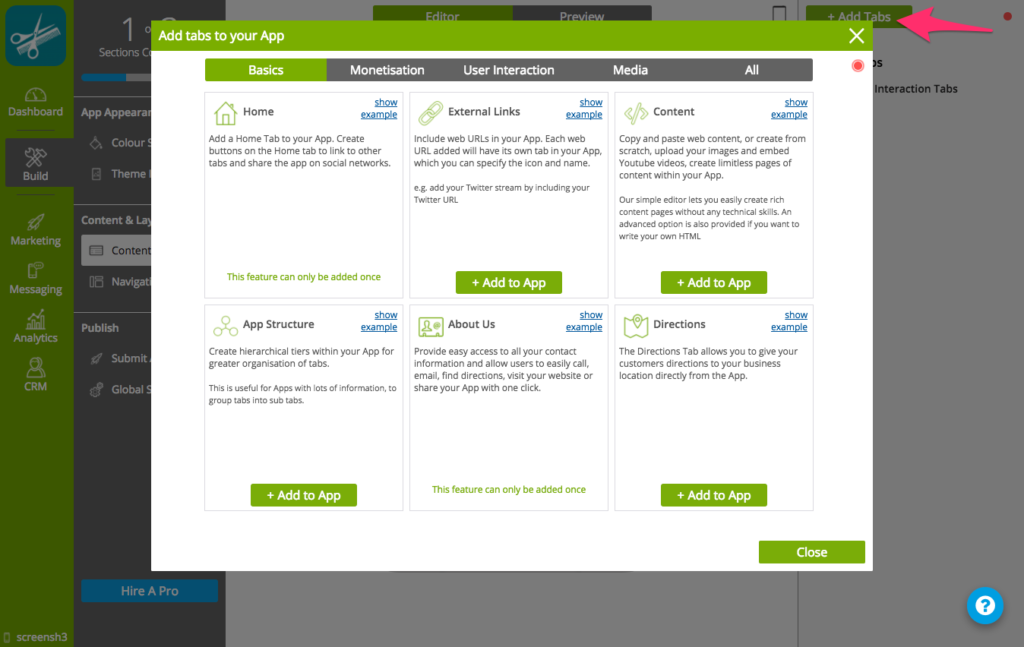
Now for the important bit: adding tabs and a little functionality. Click through to the Content tab in the left-hand menu, and then ‘+Add Tabs’ in the top right corner for a list of different pre-built tabs you can include, like forms, image galleries and an About Us page. Simply click ‘+Add to App’ to include it in your design. If you’d like to know more about each kind of tab, just check out the examples we’ve included.
8. Editing your tabs
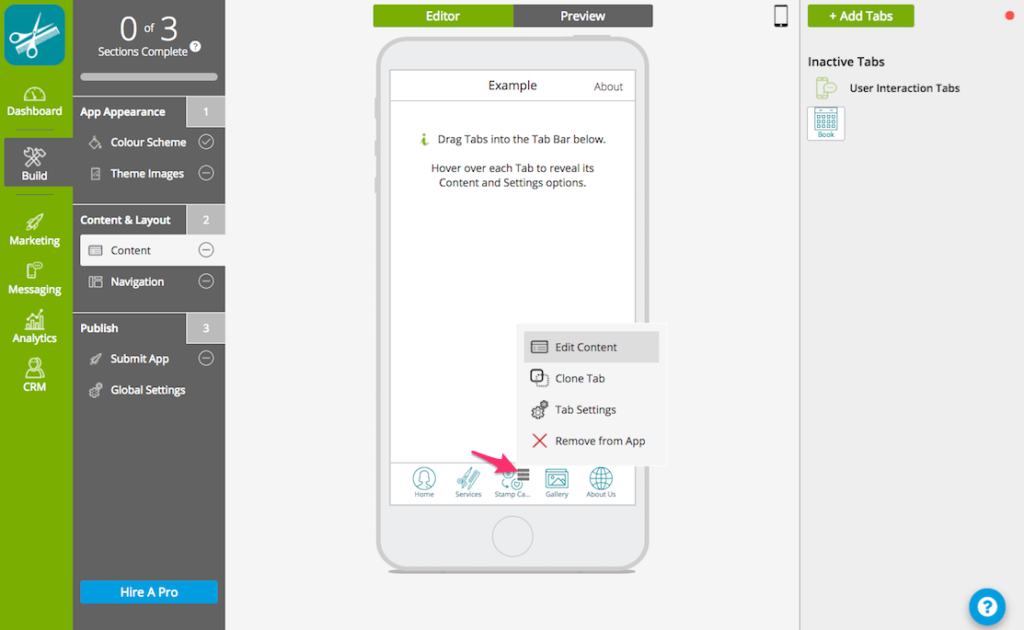
Hover over the Tab Menu below to choose how you’d like to edit each tab. You can use the Tab Settings option to change the title of your tab, or Edit Content to- you guessed it- edit the content in your tabs. Or, if you’ve changed your mind about your design, you can clone or remove your tabs too.
9. Previewing your app
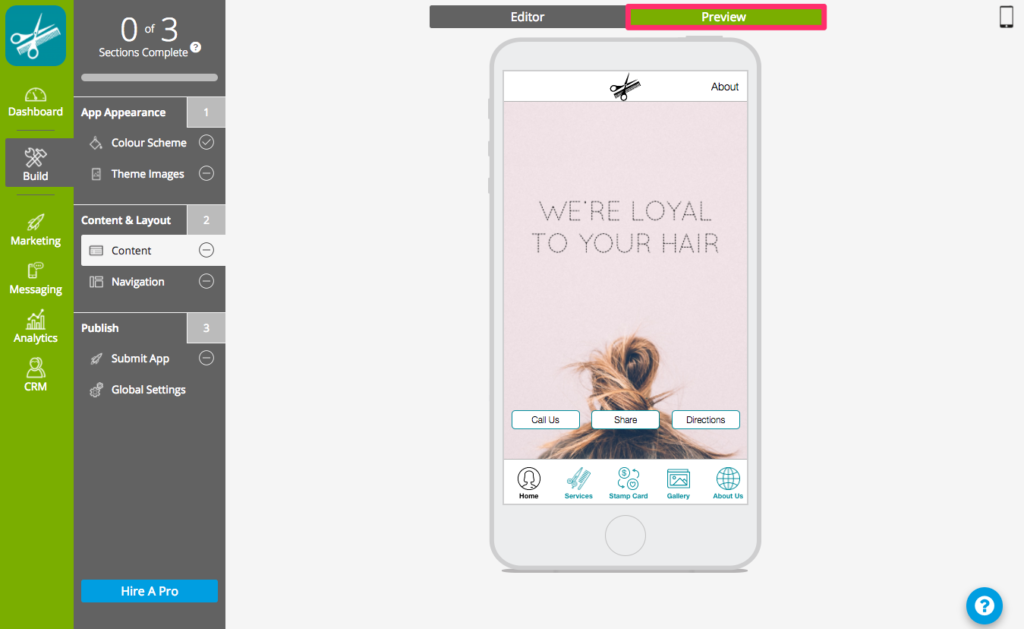
If at any stage you’d like to see how your PWA looks in action, you can switch from Editor to Preview mode. Just hover your cursor over the phone icon in the top right, and you can scan a special QR code to view your PWA in our Preview App. Go to the ‘Members’ tab in our Preview App to scan.
10. Choose your navigation style
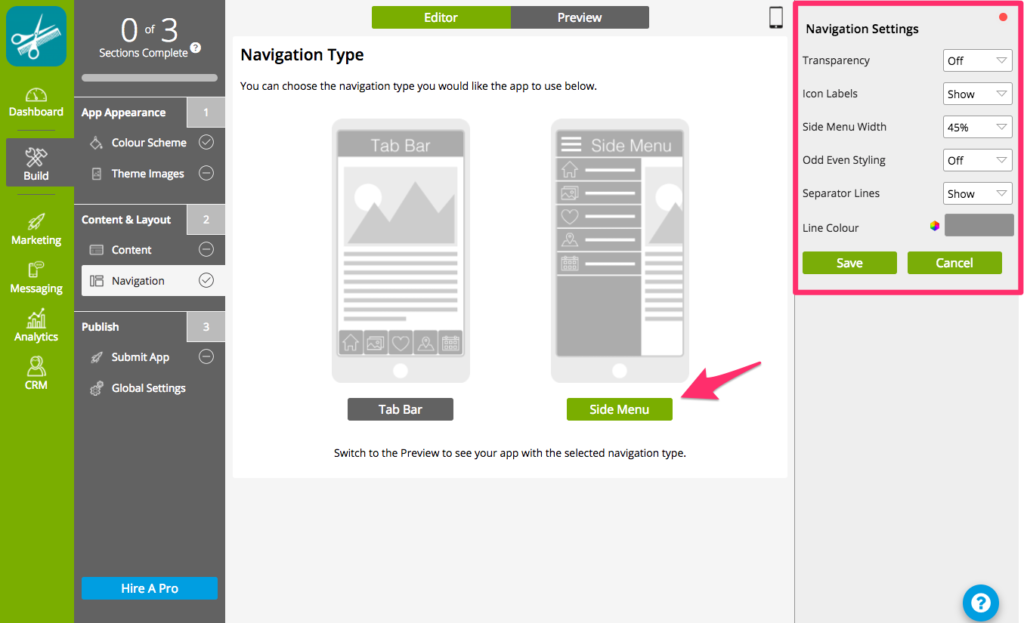
When you design your PWA, you can choose between having a tab bar at the bottom of the screen, or a sliding menu on the side of the screen. In the advanced navigation settings in the right hand toolbar, you can further edit things like transparency or menu width.
11. Publish your PWA
If you’re completely happy with the design of your PWA, there’s nothing left to do but publish it online. Given that your PWA is accessible online, it doesn’t have to be approved for submission by either the Android or Apple App Stores! So it’s a simple matter of submitting your designs to us, which we host for you. All you have to do is select the AppBuilder package, which includes both the design of your PWA and social push sharing.

12. The cost of publishing a PWA
The cost of building an app, a website or a PWA can be prohibitive. That’s why many SMEs rely on cheap outsourcing. But let’s face it: quality speaks for itself, and top quality agency apps and websites cost anywhere from £6,000 to £40,000 or more to develop.
The good news is that it’s completely free to register with us and design your app using our wizard. All you pay for is for us to publish and then host your app, which is included in the AppBuilder package. And if you’d rather leave the design to a professional, you can do just that through our website, for a fraction of the cost of hiring through an agency. So why not get started today?
To learn more about the PWA features supported by AppInstitute, click here.

0 thoughts on “How to Make a Progressive Web App”